Advanced Microsoft Excel
Part 25 - Inquire
You can use Inquire to −
- Compare two Workbooks
- Analyze a Workbook for problems or inconsistencies
- See the links between the Workbooks
- See the links between the Worksheets
- See the Relationships between the cells
- Clean Excess Cell Formatting
- Manage Passwords
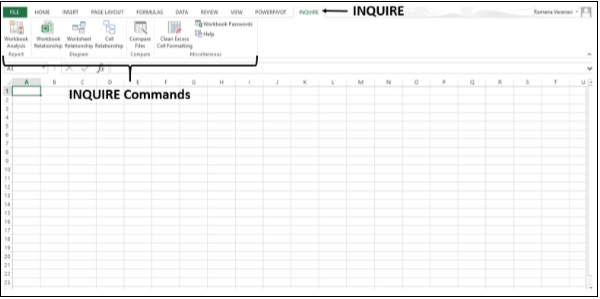 If you do not find the INQUIRE tab on the Ribbon, you have to ensure that Inquire Add-in is Active.
Ensure Inquire Add-in is Active
Step 1 − Click on the File tab. Click on Options.Step 2 − In the Excel Options window, click on Add-Ins. If Inquire Add-in is Active, then it will appear under Active Application Add-ins.
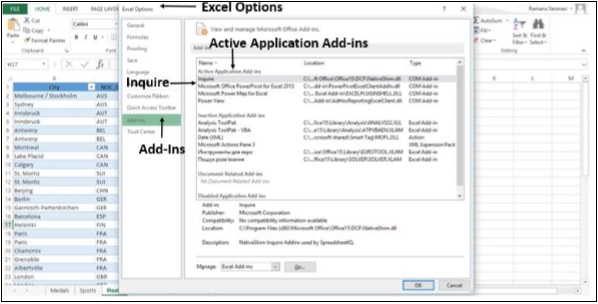 If Inquire Add-in is not active, do the following −
Step 3 − Click on the File tab. Click on Options.
Step 4 − In the Excel Options Window, click on Add-Ins.
Step 5 − In the Manage Box, Click on COM Add-ins.
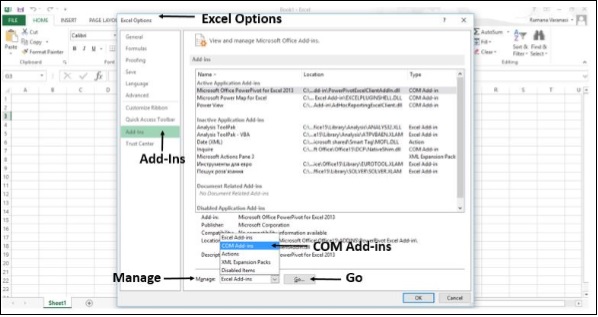 Step 6 − Click on the Go Button. The COM Add-Ins window appears. You find that Inquire is not selected.
Step 7 − Select Inquire and then click OK.
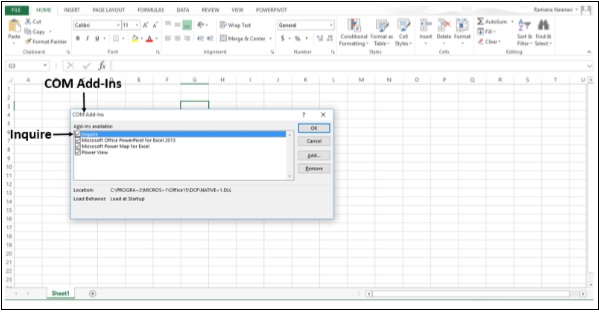 Now, the Inquire Add-In is active.
Compare Two Workbooks
You can compare two workbooks cell by cell and see the differences, if any.Step 1 − Open two Workbooks.
Step 2 − Click on the INQUIRE tab on the ribbon.
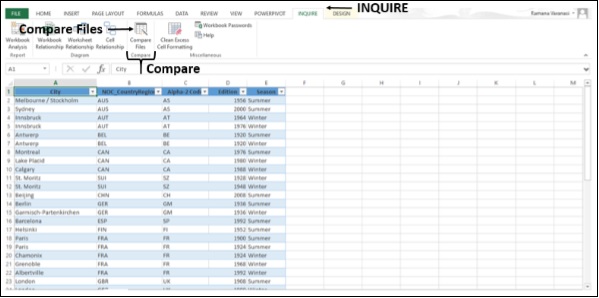 Step 3 − Click on Compare Files in the Compare Group. A ‘Select Files To Compare’ dialog box appears.
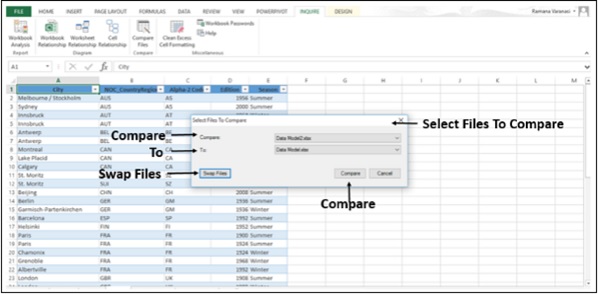 Step 4 − Check the file names displayed.
Step 5 − If the file name displayed is not the one you wanted, click on the down-arrow next to the File name. Only the Workbooks that are open will be displayed.
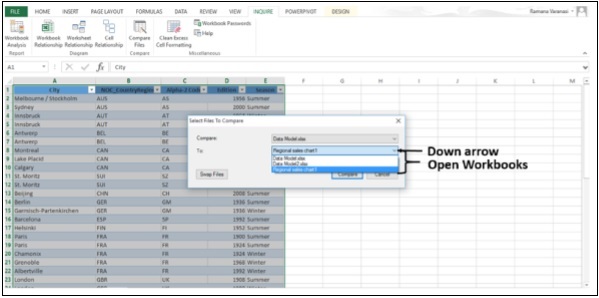 Step 6 − Select the File you want.
Step 7 − Check the order of the Files in Compare and To.
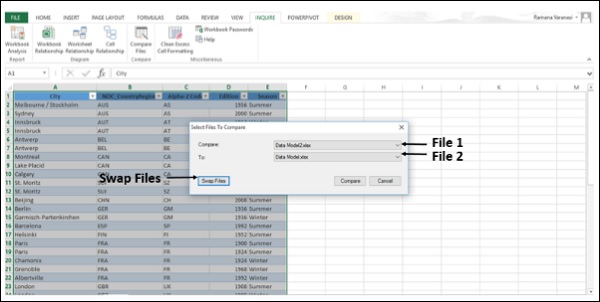 Step 8 − If it has to be the other way round, click on Swap Files. The order of the Files is changed.
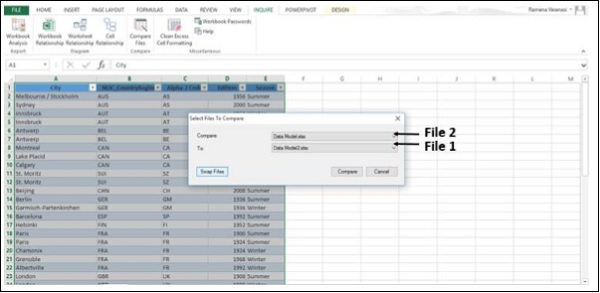 Step 9 − Click on Compare.
The results of the comparison appear in a two-pane grid. The Workbook on the left corresponds to the "Compare" file you chose and the Workbook on the right corresponds to the "To" file. The details appear in a pane below the two grids. The changes are highlighted by color, depending on the kind of change. The legend that shows what the colors mean is in the lower-left pane.
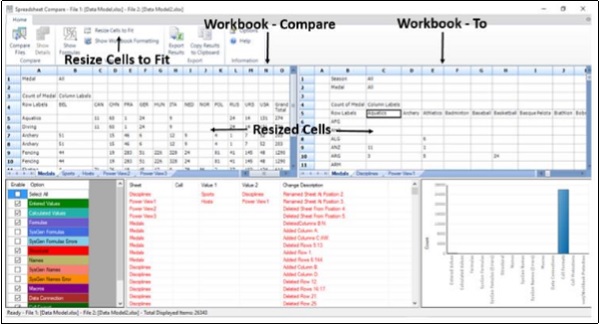
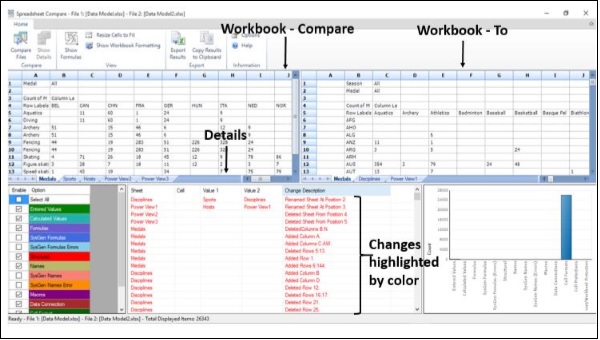 Step 10 − Click on Resize Cells to Fit if necessary, to view the cell contents in the ‘Compare –To’ workbooks.
 Step 11 − Click on the Export Results in the Export Group.
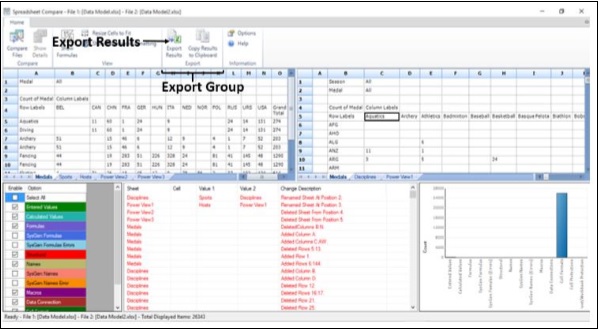 The Save As Dialog Box opens.
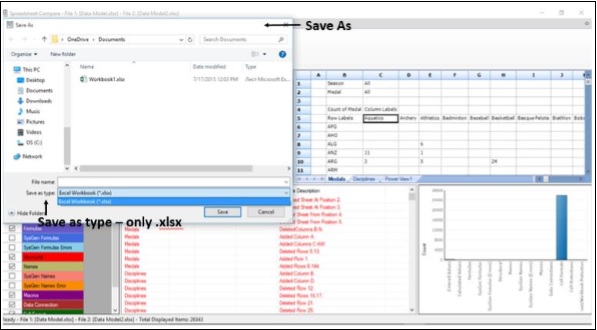 You can save the results to an Excel Workbook. Note that only .xlsx File type is available.
If you need the results in another program, you can do it by copying it to the Clipboard.
Step 12 − Click on Copy Results to Clipboard in the Export group.
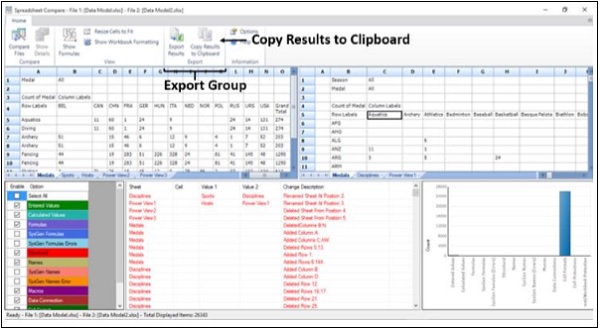 Step 13 − Paste in another program.
No comments:
Post a Comment